[Home Theater Network HDAV.com.cn] Compared to the grade and performance of cinema projectors, we rarely explore how to maximize the visual effect of your projector. Since the projector's factory settings are not optimal, its playback effect has a lot to do with ambient light and screen selection. Therefore, it is necessary to carry out the scientific adjustment of the projector according to the actual situation of the home theater.

Nowadays, there are many software and hardware debugging methods on the market, but they are expensive and are not recommended for ordinary families. Generally, the basic settings can be made through the system's preset adjustment function to meet the viewing needs of home users.
The following small series will introduce some basic adjustments of the projector for everyone, hoping to help everyone.
éœ€è¦ Need to pay attention to before adjusting the school
Installation position: The projector is perpendicular to the screen, and the lens and the center of the screen are in a straight line; when the desktop is projected, the lens is slightly lower than the curling of the screen. When lifting, the lens is slightly higher than the curl on the screen.

Connection of equipment: Use the original standard power cord and signal line to ensure the quality of the signal source and connected equipment. Try not to use connected equipment (such as crossover). At the same time, it should be noted that it is best not to extend the signal line more than 10 meters, otherwise it will easily lead to the phenomenon of tailing, signal blur and jitter.
Preheating the lamp: After turning on the power, warm up for about one minute in the blue screen state before projecting the signal to the projector.

Adjusting the resolution: Only when the resolution of the computer output signal is the same as the nominal resolution of the projector, and the refresh rate is preferably set to 60Hz, the best image effect can be obtained.
Video interface: If you connect a DVD player, TV box and other devices, try to use high-quality video signal interfaces such as HDMI and DVI, and avoid using poor quality interfaces such as S-Video and AV composite terminals.

â–ŒResolution choice
First read your projector manual carefully to find out what the maximum resolution of your projector is to match the computer. For example, if the projector supports only 800×600 resolution and the computer output is 1024×768 or 1440×1080 video signals, the projector will automatically scale the image to fit the projector's maximum projection. Resolution, which can seriously degrade the image quality. Therefore, first make sure that your projector's maximum support resolution matches the computer's output source to achieve the best possible projection.

▌ focal length adjustment
The projector also needs to focus, otherwise the projected image will be blurred. Before making the focus adjustment, first select the projection distance, move the projector left and right or up and down, so that the image is in the center of the screen or projected to the ideal position on the wall. Then adjust the focus ring near the lens to make the image visually clearest.

If the projector has a motorized focus function, the whole job becomes much simpler, and the user only needs to adjust the details in front of the projection screen through the remote controller. In addition, you can choose which screen to focus on, you can choose the focus debugging screen built into the projector, or you can select the focus dedicated screen in the test disc.

â–ŒSignal input selection
Before continuing to analyze the basic debugging of the projector, it is also necessary to note that the calibration values ​​of most display devices are related to the input. In other words, if the signal is input in HDMI 1.0, the adjusted value is only for the port of HDMI 1.0. If you plug in the HDMI 2.0 port, you must re-set all the screen parameters.

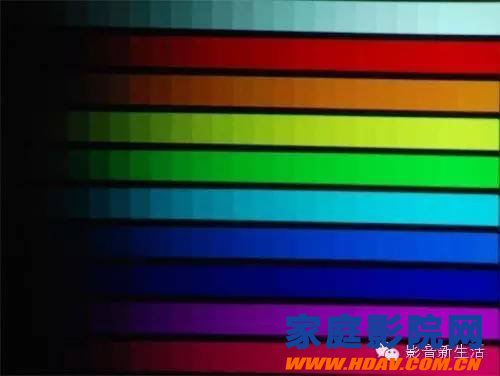
â–ŒScreen effect adjustment
Next, you need to adjust the parameters such as color temperature, sharpness, color, and brightness. It is recommended that you adjust the color temperature first, then the brightness, then adjust the color, and finally adjust the sharpness to achieve better projection.
In the general projector adjustment menu, there are color temperature adjustments. By adjusting the color temperature, the visual effect of the image can be significantly changed. In China, the average color temperature in the whole year is between 8000K and 9500K, so the TV station produces the program with the viewer's color temperature of 9300K. However, because the usual color temperature in Europe and America is different from ours, the average color temperature of the whole year is about 6000K. Therefore, when we look at those foreign films, we will find that 5600K~6500K is most suitable for viewing.

Of course, this difference makes us feel that when we suddenly see the screen of a computer or TV in Europe and America, we feel that the color temperature is reddish and warm, and some are not suitable. People with dark eyes may see that 9300K is white, but those with blue eyes look blue. The 6500K blue-eyed people look white. We Chinese people look yellow.

After adjusting the color temperature, we adjust the brightness again. When the brightness is adjusted to get enough black without losing a lot of dark details, adjust the contrast to get a strong enough high-light energy and detail to get the maximum dynamic range. It should be noted that the brightness should not be excessive black, otherwise the dark details will be lost, and the contrast should not be too high, otherwise the problem of high light level shift will occur.

In terms of color, for the players just getting started, don't pay too much attention to the color management system and the gamma curve adjustment function, because these adjustment functions need to be used with a more professional color adjustment system, such as video signal generator, color analysis instrument, etc. . Basically, you only need to carefully adjust the preset color and hue to get quite good results. If you want better results, you can choose an entry-level color adjustment system such as Spyder 4.
Finally adjust the sharpness. Sharpness is very important for the reproduction of picture details. It should be noted that when adjusting the sharpness, it is not the bigger or the smaller, the better, but just the right one. You can make detailed adjustments according to the test screen, otherwise the text or image edge ghosting will appear. Happening.
â–ŒKeystone correction
We often find that after the projected image comes out, it will produce a deformation of "upper down" or "upper down". This kind of projection distortion is called "keystone" or "trapezoidal deformation". Most of the previous projectors had a special knob on the machine for adjustment. Nowadays, the projector almost integrates this adjustment function into the menu, and can directly adjust the relevant options.

If you raise the end of the projector, it will cause a trapezoidal phenomenon, and you can adjust the picture to the rectangle through the keystone correction. When the projector has to be placed sideways due to environmental concerns that cannot be placed in front of the screen, it creates another trapezoidal phenomenon. At this point, you need to adjust the picture with horizontal keystone correction. In general, horizontal trapezoidal correction is less useful than vertical trapezoidal correction. It is recommended to everyone that unless you set the environmental restrictions, try not to use the trapezoidal correction function. Because the trapezoidal correction is calculated by the scaler, the sharpness of the picture will be worse.
Conclusion: If you pass the above basic installation and debugging process, you can let the projector enter the normal viewing state, but to get more accurate, true and natural color performance and accurate skin color reproduction, you need to project the projection. The machine makes a deeper and more professional adjustment of the gamut space. More fresh and fun home theater information, please pay attention to home theater network http:// (WeChat: cnhifi), the country's most influential home theater audio player interactive media website.
Note: This article is transferred from the new life of audio and video. The article is an independent view of the author and does not represent the position of the home theater network.
China leading manufacturers and suppliers of DC Support Capacitors, DC Capacitor , and we are specialize in Electrolytic capacitor,High Voltage Capacitor, etc.DCMJ DC Support Capacitors
DCMJ DC Support Capacitors
DCMJ DC Support Capacitors,Capacitors High Voltage,Dc-link Filter Capacitor,Dc Film Capacitors
YANGZHOU POSITIONING TECH CO., LTD , https://www.yzpstcc.com