Sure! Here's the rewritten content in English:
---
So, why am I writing this article? Today, I came across one of the most popular posts online, and while it was interesting, I thought I could make it clearer and simpler. Honestly, I believe I can create something even better. After reading a friend’s article about Kodi and doing some research myself, I realized how easy and user-friendly it is for beginners. That inspired me to write this piece, aiming to guide people through setting up their own home media systems in a straightforward way. Nothing fancy—just practical help.
First things first, let’s talk about Kodi. You can download Kodi from their official website: [Kodi Official Site](https://kodi.tv/download). Here’s how you can get started:
**Kodi Installation:**
1. **Windows Users:** Head over to the official site and download the version compatible with your OS (Win7/8/10). It’s pretty intuitive.
2. **Linux Users:** If you’re into Linux, you’ll find it fairly easy to install via package managers like apt-get or yum.
3. **Android Users:** For those using Android, especially on smart TVs or TV boxes, ensure you download the appropriate version (usually ARMV7 or ARMV8).
If you're unsure about your device’s compatibility, don’t worry—just ask the seller or try downloading both versions to see which works best.

Now, let’s move on to the setup process. You’ll need a router and a USB storage device connected to the router for network sharing.
**Router Setup:**
1. Connect your USB storage device to your router (for instance, a TP-Link RT-AC68U).
2. Log in to your router’s admin panel.
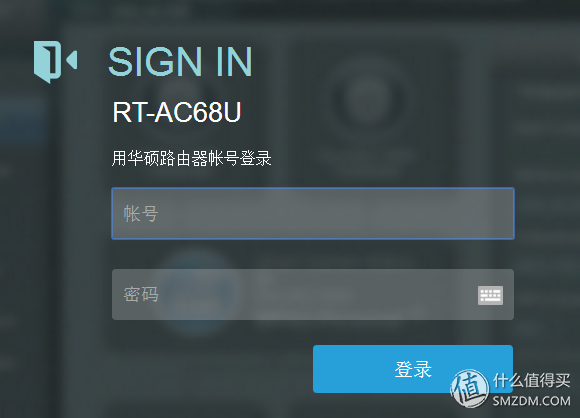
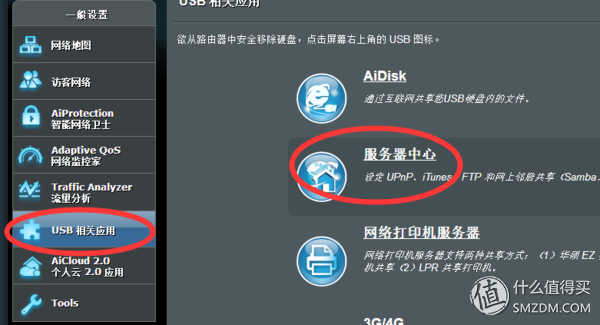
3. Navigate to the USB application settings and enable the SAMBA server. Allow anonymous access to simplify things.
Once Kodi is installed, you’ll notice the interface is initially in English. Let’s switch it to Chinese for easier use.
**Language Localization:**
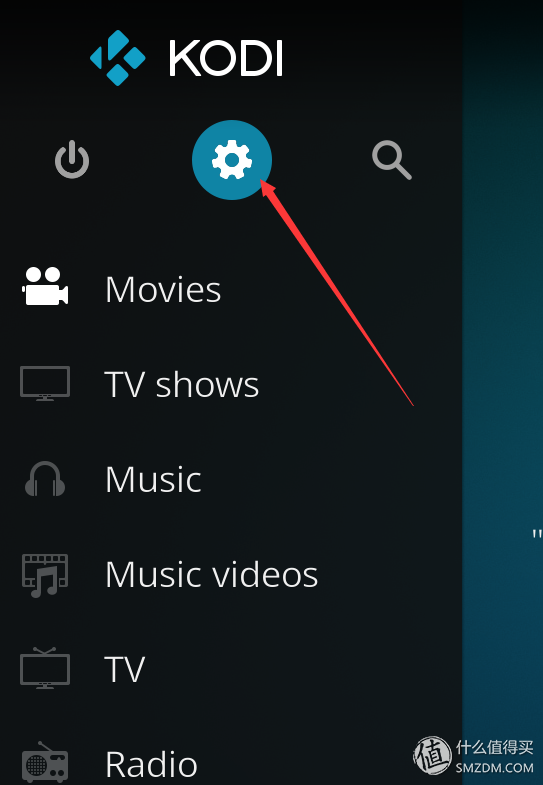
1. Open Kodi and head to the settings menu.
2. Go to the appearance settings and change the font type to the second option to support Chinese characters.
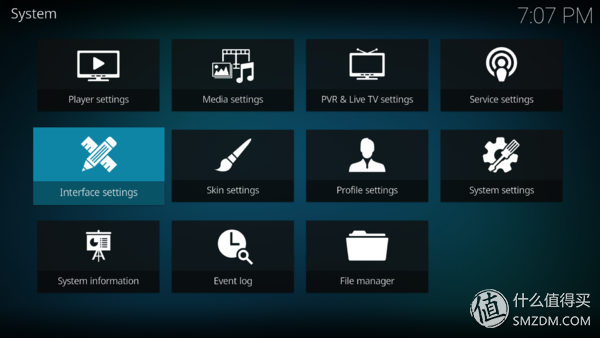
3. Now, select “Chinese (Simplified)†under the language options.

After applying the changes, you should see everything in Chinese within seconds!
**Adding Network Shares:**
To add shared files from your home network:
1. Navigate to the File Manager and select the directory you wish to share (like videos or movies).
2. Use SMB protocol, which you’ve already set up in your router’s SAMBA settings.
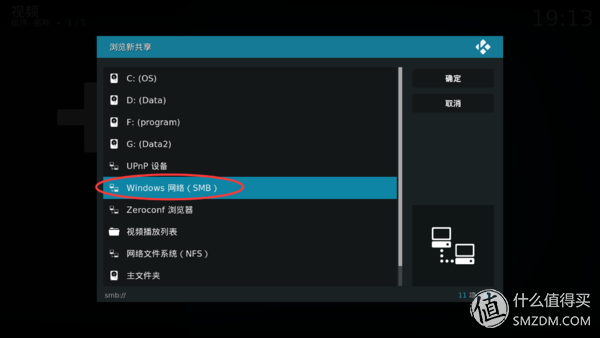
Once connected, you can browse your shared folders and add them to Kodi.
**Playing Media:**
With everything set up, you can now easily browse and play your media files. Whether you’re using an iPad, iPhone, or Android device, the process remains smooth and seamless.
**Conclusion:**
This setup is lightweight and efficient for anyone looking to enjoy family media sharing without any hassle. Whether you’re streaming movies or downloading shows directly to your router-connected USB drive, it’s a great way to keep things organized and ad-free.
Finally, feel free to reach out if you have any questions or suggestions. I’d love to hear your thoughts! And remember, there’s always room for improvement—so keep exploring and sharing your experiences.
Cheers!
---
Let me know if you'd like further tweaks!
Aluminum-cased Electric Projection Screen
4-definition image quality, high-definition resolution of natural field of view, equipped with HDR high dynamic range image resolution, improving image contrast, wider open angle, consistent and clear visibility of images seen from different positions, as if you are in person.
Aluminum-Cased Electric Projection Screen,Hd Aluminum Shell Electric Projection Screen,Home Motorized Projector Screen,Motorized Electric Hd Projection Screen
Jiangsu D-Bees Smart Home Co., Ltd. , https://www.cI-hometheater.com