When the NAS was installed years ago, it also took a moment to write about the hardware. After the article was published, everyone's Tucao was relatively consistent, focusing on the configuration surplus and the high power consumption. In fact, I would like to say that I am most satisfied with that Chassis. When I wrote that article, I chose a single article. I didn't select a series of articles. I thought I could change it later. Later I discovered that I couldn’t change it. I had to turn to the editors. The editing efficiency of Auntie was really high. I quickly changed it and I must like it. .
 One of my NAS road articles: # Original Innovators #Hardware articles began to know that Aunt Zhang was searching for a laptop because she was searching for a laptop. When she saw the content on Zhang Aunt, I felt very surprised. There was still such a thing. The website lists various kinds of preferential information. However, it was not bought at that time and it gradually faded into oblivion. More than 400 days ago, it was a coincidence that it came to see a variety of high-quality preferential information. Original articles were deeply attracted, registered, browsed, compared, which time to buy things crek| Likes 50 Comments 71 Collections 425 View Details
 As already stated in the first article, NAS is the most important software. Why does Shinhwa sell so expensive, because the hardware is expensive, NONONO, and the group's hardware configuration is not high, but the group's software value is that price. With the rapid development of the Internet, subject to our special national conditions, while we endure high-priced hardware, while enjoying near-zero software, is this yin and yang reconciliation? Only if the hardware does not have software, we still can't do anything. This article talks about system selection and installation.
At present, there are a lot of system options for NAS that I have assembled myself, such as windows, BlackSmith, Linux, FreeNAS, etc. According to my hardware configuration, my choice is windows server 2016, virtual group Hui. There are mainly the following reasons: :
1 I have been using windows for so many years. I am familiar with it. It is easy to operate and has many online resources. After I encounter problems, I can basically solve it on the Internet. As to why it is 2016 instead of 2008R2, 2012R2, etc. I think the new system is for new hardware. The support is better, and it seems to force a bit higher.
2 software is rich, basically all kinds of software have windows version, even if not, we still have the virtual machine.
3 Disk format Select NTFS, which can be easily used on different computers to facilitate data transfer, recovery, and repair.
4 group Hui's software is very good, the function is complete and perfect, the interface is friendly, and windows complements each other, for example: photo station, I did not find such convenient, friendly software under windows. If you only pack the group of Hui, it feels a bit wasted on the hardware.
5 Everyone uses it.
First, install Server2016 through windows deployment service (WDS)After installing the hardware to install the system only to find, I actually have no carrier can be used to install the operating system, U disk is only 4G, can not fit Server2016, DVD burner is one, but have to be removed from the desktop, and then put The NAS had to be unpacked and reloaded, and there was another problem. The server image of the Server2016 had nearly 6 G, and it could not fit on a regular DVD. What could be good about this? Go to the electronic city to buy a D9 burn disk? It's too cold, or stay at home; buy a bigger U disk online? The fastest to come tomorrow, and the price of the model I want is not appropriate. As a non-advanced lover who is dealing with computers every day, this small issue must be solved by oneself. I have heard of Windows Deployment Services (WDS) for a long time. I have never had a chance to try it before. Now it is a godsend.
1. PreparationTo use WDS, the following conditions must be met:
1 The computer on which the operating system is to be installed must support booting from the network.
2 have an installation image file.
3 There must be 1 DHCP server in the network.
4 have WDS server.
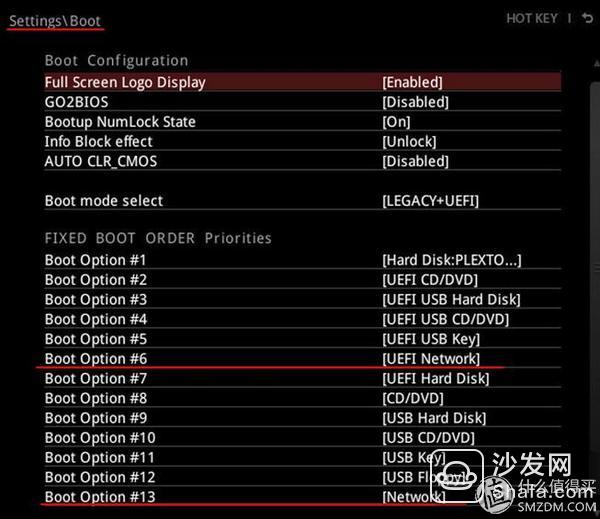
1 No problem, now the motherboard basically supports booting from the network. Because the motherboards of different brands are set up in different ways, you can look for the boot, lan, PXE, and network-related options in the BIOS settings. You should be able to set up successfully or search the Internet. Even a phone call from the motherboard manufacturer can be used. I use the MSI 100 series motherboard. The options are as follows.
2 There is no problem, ready for Server2016 ISO file, right-direct loading, there will be a CD drive letter, which is the file we need.
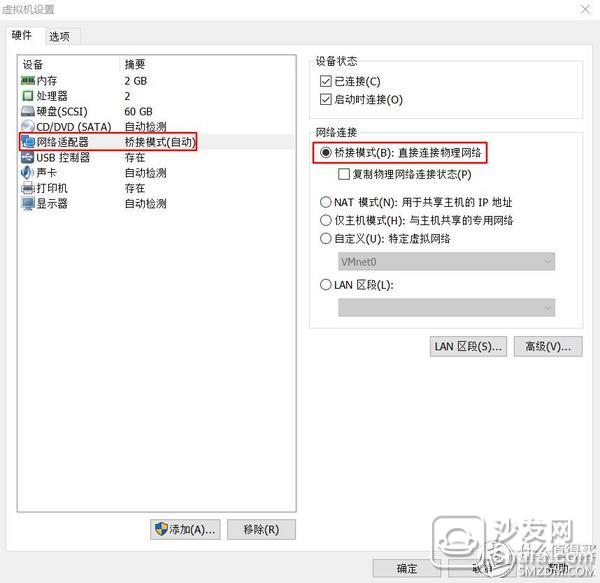
Pole routing 3 could have acted as a DHCP server, but the goods only have 2 LAN ports, one is Gigabit, and the other is actually 100Mbit. All of them are pits. Using WDS in such a local area network, forcing the grid to be pulled instantly. Low, how can this be? So the final solution is this: On the notebook there is a ready-made Server2016 virtual machine, installed DHCP and WDS, notebooks and NAS directly connected through the network cable, faster. But it is important that the virtual machine's network card is set to bridge mode, I use VMware Workstation PRO, right click on the name of the left virtual machine, select Settings, set as shown below
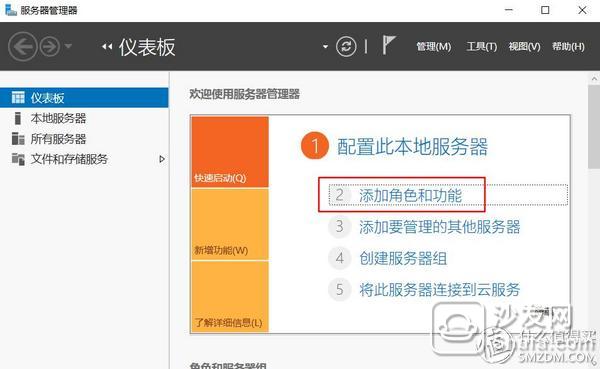
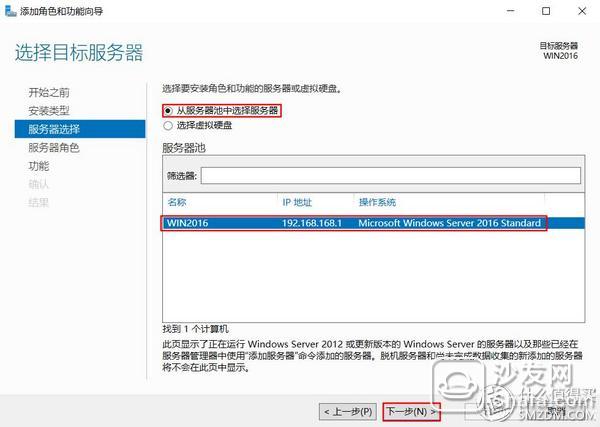
Before installation, first set a static IP address and subnet mask for the VM (for example, I use 192.168.168.1, the mask is 255.255.255.0, and the gateway does not need it). After the preparation is completed, I set up the DHCP and WDS. Server Manager in Virtual Machine Server 2016, Adding Roles and Features


Select DHCP Server and Windows Deployment Services respectively
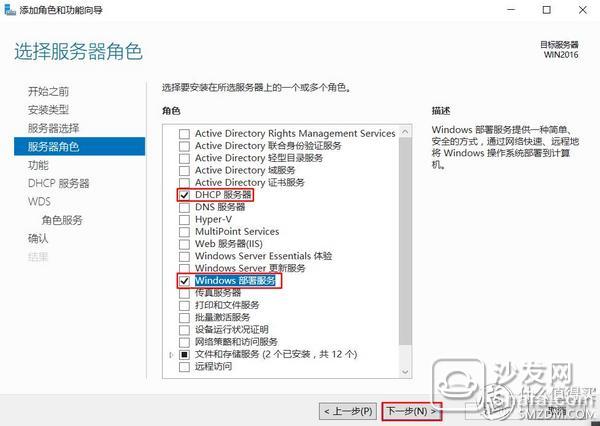
This is why you need to set an IP address for a virtual machine

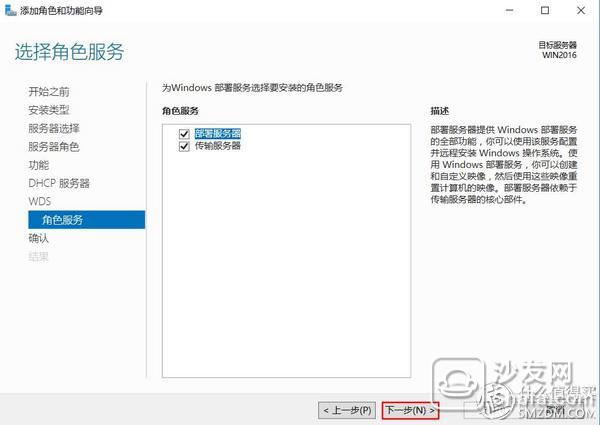
DNS service is not necessary and can be used without installation. Now install the system disk should use the NTFS format it.

Both are selected
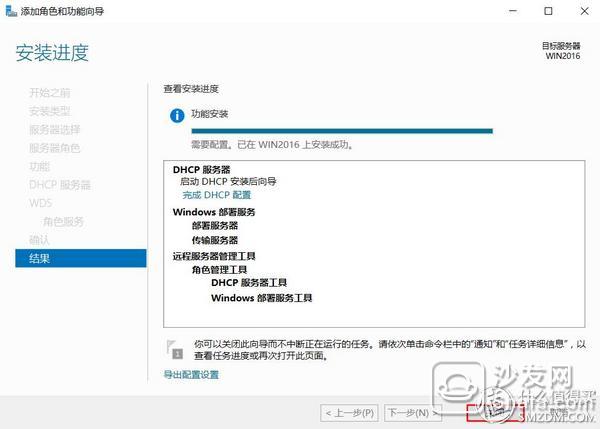
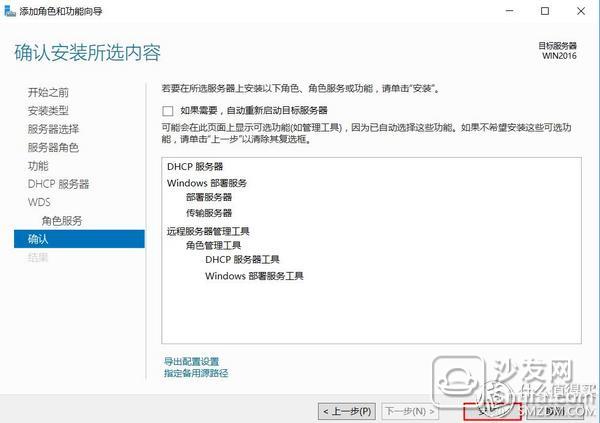 The installation is complete.
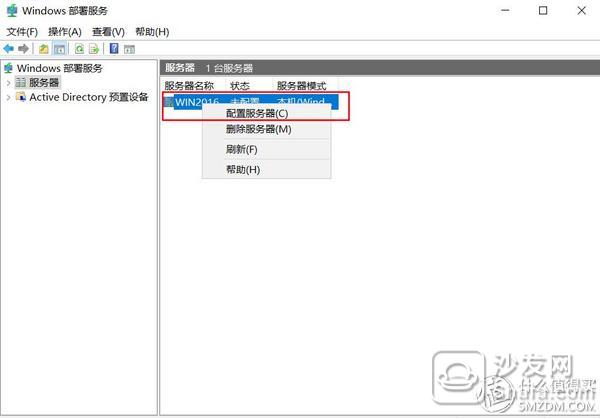
A DHCP server generally does not require special configuration. You only need to configure WDS. After the installation is complete, you can open the Windows Deployment Service from the Start menu or the Tools menu on the server management interface. Right-click on the right server name and select Configure Server.
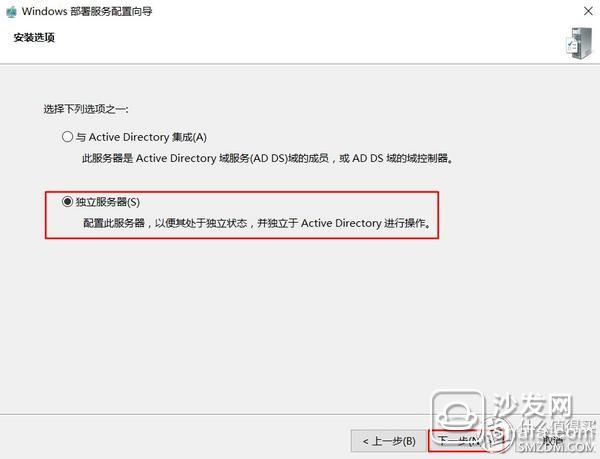
We do not use Active Directory, so please choose a standalone server
The path of the remote installation folder is recommended to use a non-system NTFS partition, but my virtual machine has only one partition, no way, can only choose the C drive, anyway, will not be pregnant

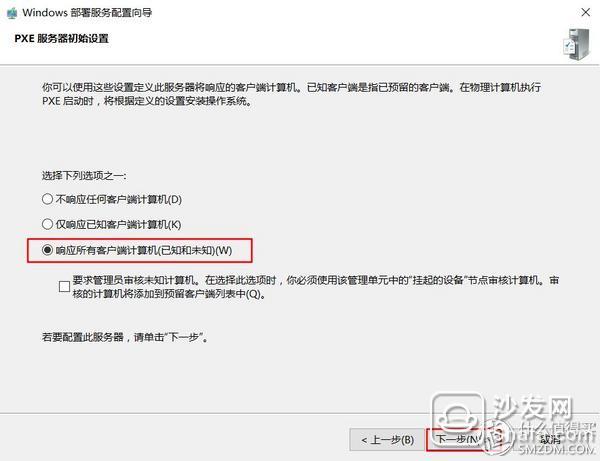
Must choose to respond to all client computers, otherwise not
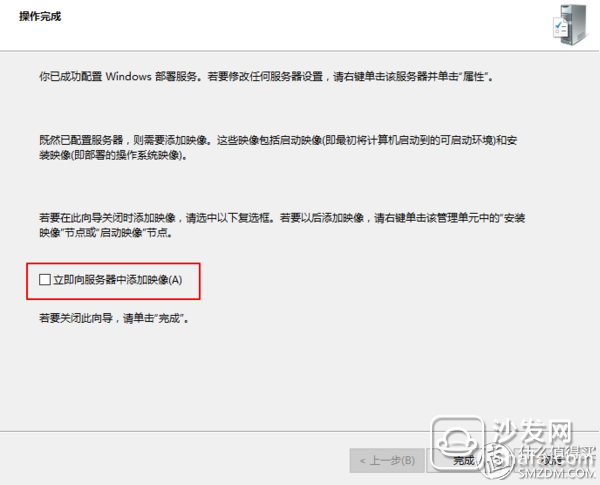
After successful configuration, do not choose to add images to the server immediately, we operate from the menu
Go back to the WDS configuration interface after completion, right click on the boot image and select Add boot image

Select the letter of the ISO file we loaded earlier and navigate to the boot.wim file in the Sources folder

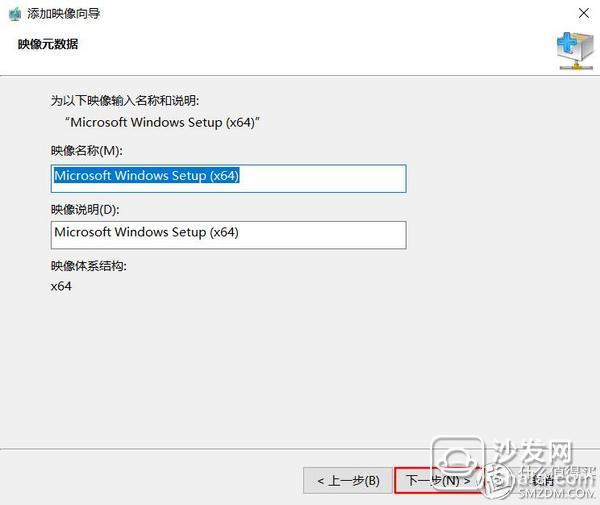
The name starts casually

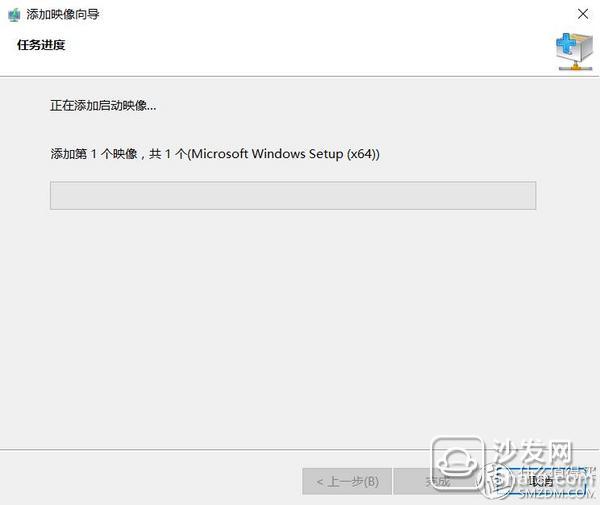
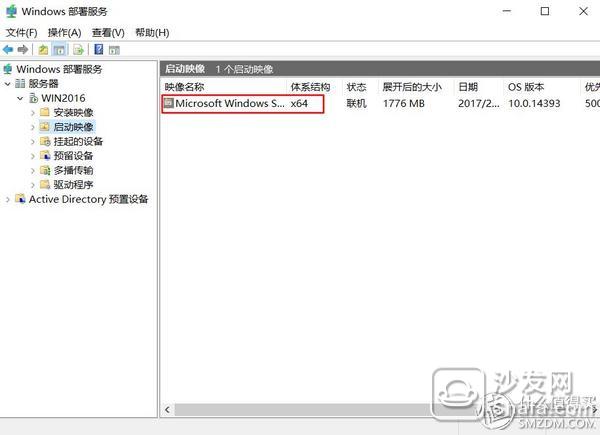
After completion, return to WDS configuration interface, you can see there is already a boot image
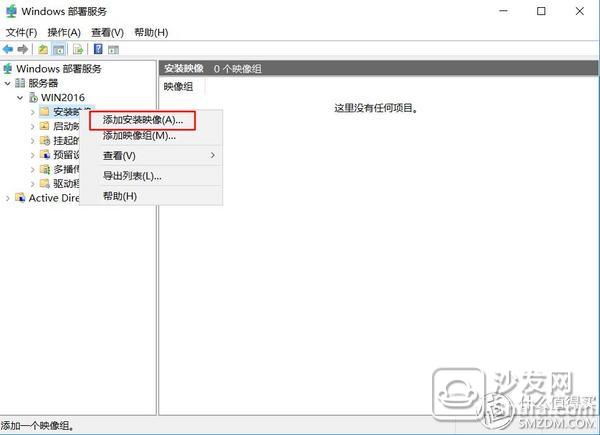
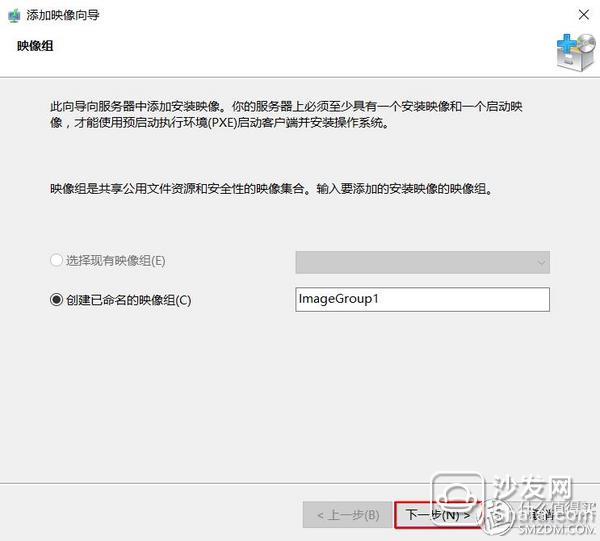
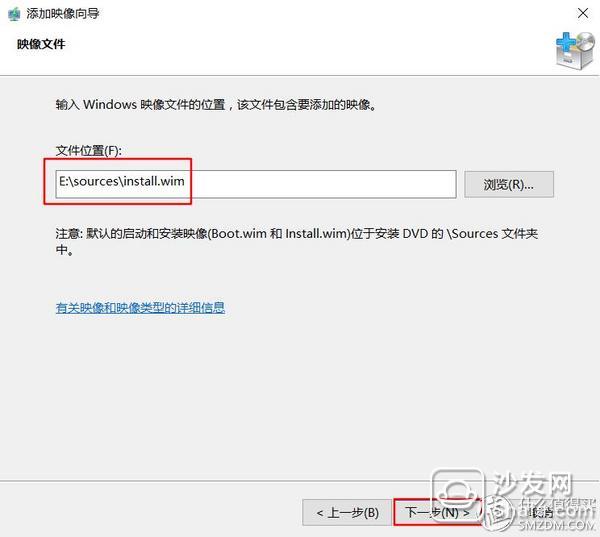
Then right click on the installation image and select Add Installation Image
Select the corresponding install.wim file
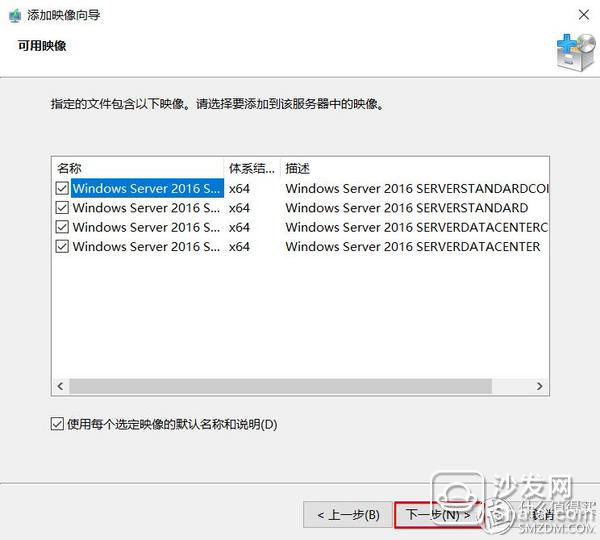
You can select the image to add to the server as needed

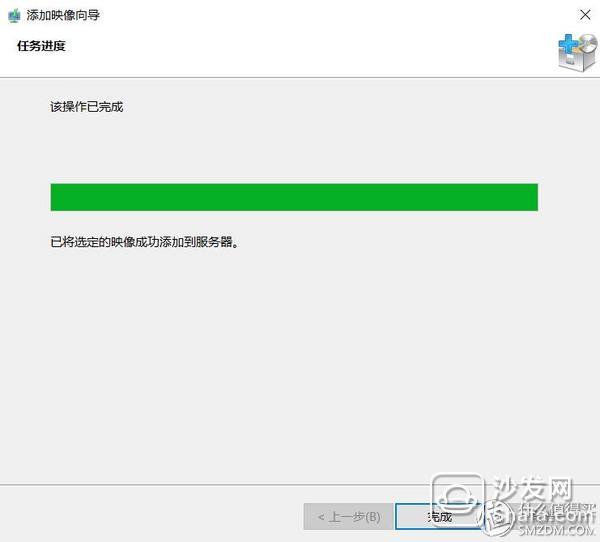
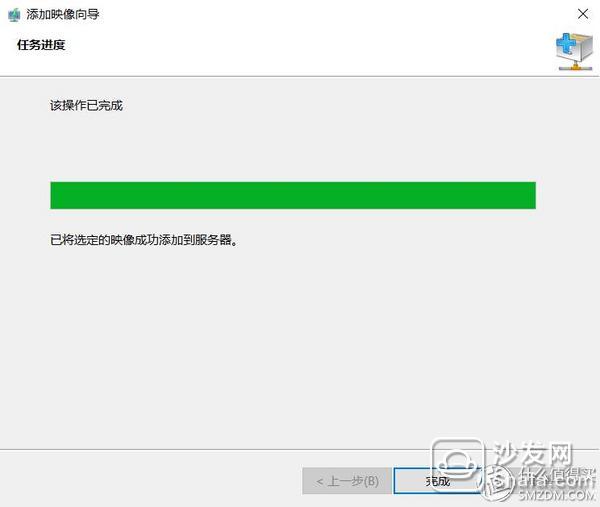
After the completion of the installation of the operating system can be.
I think WDS is very easy to use, you can always add a system image, you can basically discard the installation CD, install the U disk, whether it is home or office is very suitable, so I also installed WDS on the NAS.
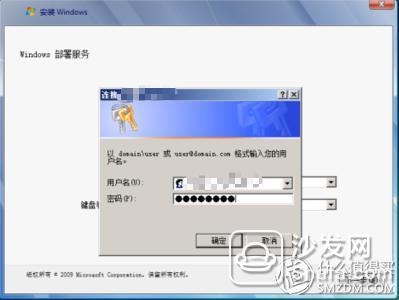
Connect the NAS to the keyboard, mouse, and monitor, and then connect directly to the laptop via a network cable. After the NAS is powered on, select Start from the network (I'm booting and press F11 to start the selection menu). The NAS will automatically obtain the IP address from the DHCP server. Boot from the boot image of the WDS server, and then start the installation of the system, the process is almost the same with the CD-ROM to start the installation, the interface is basically the same, but when prompted for the user name and password to correctly enter the user name and password of the WDS server system (user name: host Username
The rest is the general windows installation process. After the installation is complete, remember to reconfigure the NAS's IP address when deploying the NAS to the actual network environment.
1. Wake on LAN
With Wake on LAN, you don't need to press the power button when you boot, especially when the NAS is in a location that is not easily accessible. This feature is especially important. Wake-up on the network requires the support of the motherboard and network card drivers. Now the new motherboards basically have this function. The following options need to be noted in the BIOS setting of the MSI 100 series motherboard:
LAN Option ROM is related to diskless workstations and should be set to Disabled

The network card is a PCI-E device and the Resume By PCI-E Device needs to be set to Enabled.

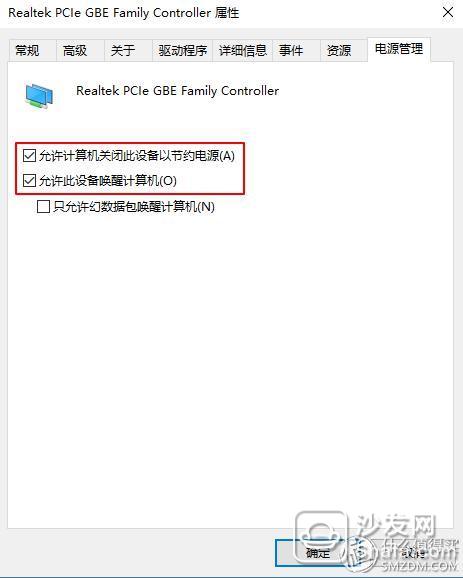
NIC driver settings, in the NAS device manager to open the NIC's properties interface power management menu, some information on the "Allow the computer to shut down this device to save power" tick off, but in my system When you select this option, the following two items will be grayed out, and the system will still wake up if checked.
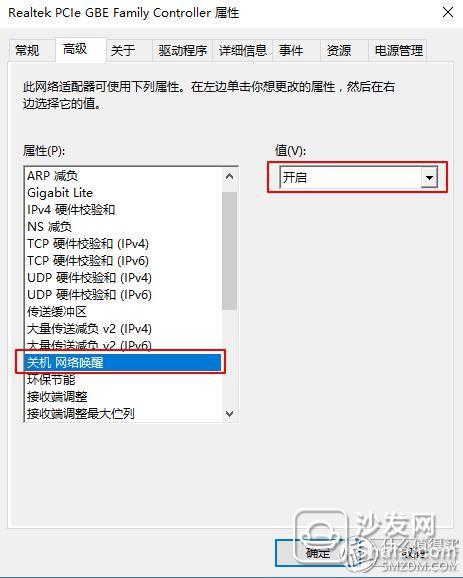
Advanced menu
Pole routing 3 has a plug-in to wake up the remote computer. In the case of a computer shutdown, the device can be waked up by inputting the device's MAC address or by clicking the wake-up button in the device list. After installing the Pole-route APP on the phone, it is no matter when. Wherever you can wake up.

This is the last to use the keyboard, mouse and monitor. Open the system from the start menu - remote settings

The default Administrator can be accessed remotely. If you want to use other users to access it, remember to add the corresponding user first, and remember to set a sufficiently complex password. After adding the general firewall will prompt to add rules, set it as required.

Since the NAS is generally behind the router, the internal IP address is used. After this configuration, only the local LAN can access. If the external network access is to be achieved, the public IP address is generally required. The port forwarding and dynamic domain name are set on the router. The IP of the public network depends on the situation of operators around the country. I used to be the public network IP before. Afterwards, telecommunication was changed to the intranet IP. I found a reason to call you and let them change to public IP. Polar routing provides two plug-ins for dynamic domain name and super port forwarding. You can map port 3389 of the remote desktop to an external port. Then you can use the domain name or WAN port IP provided by the remote route to connect to the remote network from the external network to the intranet NAS. .

After setting up the remote desktop, you can put the NAS where it should be, and let it be a beautiful man quietly. PC-side access can use Windows' own remote desktop connection. Both IOS and Android have Microsoft's official remote desktop apps. Although the screen is too small, the experience is not very good, but it is occasionally used for emergencies.
3, system activationPreviously in order to activate win10, under a tool, did not expect to be bundled with malicious software, hijack the browser home page, then find a clean activation tool everywhere, accidentally saw the vlmcsd this software, support the activation of the VOL version of windows and office, and a lot of revision The router firmware contains this plug-in. Once installed, all computers in the home can use it. It's also an artifact. Then has been looking forward to the polar route also out of such a plug-in, did not expect that long time, the polar route out of a KMS_Activator plug-in, really timely rain, ah, quickly put the plug-in.
Right-click on the NAS's Start menu and select "Command Prompt (Administrator)", then enter the following commands:
Slmgr /ipk XXXXX-XXXXX-XXXXX-XXXXX-XXXXX XXXXX represents the installation key. If you enter the key during installation, this step can be skipped. Only the following two steps are performed.
Slmgr /skms 192.168.1.1 The IP address is the address of the KMS activation server. In this example, it is the address of the polar route.
Slmgr /ato
Although KMS activation only has a 180-day validity period, after activation, the system will automatically connect to the activation server for inspection and automatically postpone it at regular intervals. Therefore, as long as the router is always on, there is no need to worry about the activation problem. I don’t think nobody will be 180 days. Turn it on.
4, disk managementAt present, there are only two hard disks except the system disk and the capacity is not the same. Therefore, my disk management goal is to be easy to use. Each disk is divided into zones. I think this has the following advantages:
1 is simple to set up. Disk management is relatively simple, most people will not be prone to errors, if you use RAID, storage pools, etc., set up trouble, in case of misuse, regret it, and many motherboards do not support RAID.
2 Save money. Can make full use of the existing idle hard drive, idle hard drive generally vary in size, if you do RAID will cause space waste, RAID generally choose the same capacity hard drive, if you buy at the same time, the capacity will be used up soon, large capacity Too expensive is not a small expense. If you do not use RAID, you can flexibly choose the timing to save money as needed.
3 backup flexibility. Generally, the reliability of data for home use is not particularly high. It is mainly to prevent data loss and accidental deletion. Backup software is used to flexibly select backup time and data. Important data is often and multiple copies are backed up, non-important data can not be backed up, and data can be completely protected. Security, compared with RAID1, although the data reliability is slightly worse, but it can effectively save hard disk space, the general home already. Note Note: Regardless of whether or not to use RAID, important data must be multiple, multi-disk backup, it is best to have offline (mobile hard disk, etc.), cloud disk, multiple computer backup, and often backup, frequent backup, regular backup .
4 easy to replace. The amount of data will gradually increase over time, and it is generally difficult to prepare for predicting capacity requirements for a future period. The replacement of a larger hard disk becomes an inevitable choice, and the hard disk will also need to be replaced due to failure or other reasons. In this mode, we can replace the old hard disk with a new, larger hard disk at any time, and then use the backup to restore the data, and we can work normally, without being constrained by the capacity of the hard disk such as RAID.
Third, summaryThe installation and basic configuration of Windows Server 2016 is over here. I have made choices based on my own needs and understandings. I may not be very mature or reasonable. I welcome everyone's criticism and corrections, and I hope that we can initiate a few hundred flowers.
The operating system just provides us with a complete environment. To implement various functions, we must install the corresponding software according to the requirements. I hope to continue sharing with everyone. As mentioned earlier, the virtual group Hui, but this article is over, I have not written, in fact, because I already have an operating system, I prefer to see virtual group Hui as a software.
Solar Panel,High Quality Solar Panel,Solar Panel Details, CN
Wuxi Shengda Yukun Energy Development co.,Ltd , https://www.xlite-solarlight.com